Why Is Premiere Pro Slow on Your Laptop?
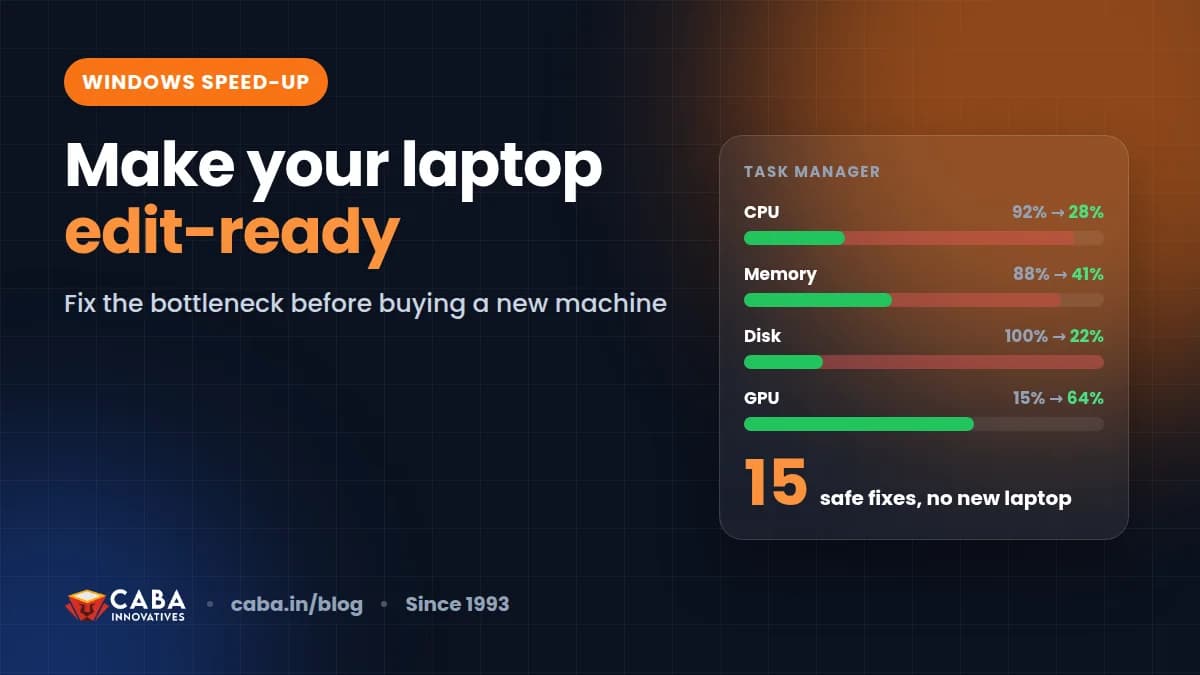
Students often tell us their laptop is too weak for Premiere Pro. Most of the time the laptop is fine. Premiere is either using the processor alone, playing full 4K preview, short of memory or writing cache to a full drive. Fix the settings first. Buy hardware later.
This guide covers settings inside Premiere Pro. For Windows-level fixes like startup apps, power mode and graphics drivers, read our speed up Windows for video editing guide. If you are choosing a new machine, see the minimum laptop for video editing.
Which Premiere Pro Settings Make Editing Faster?
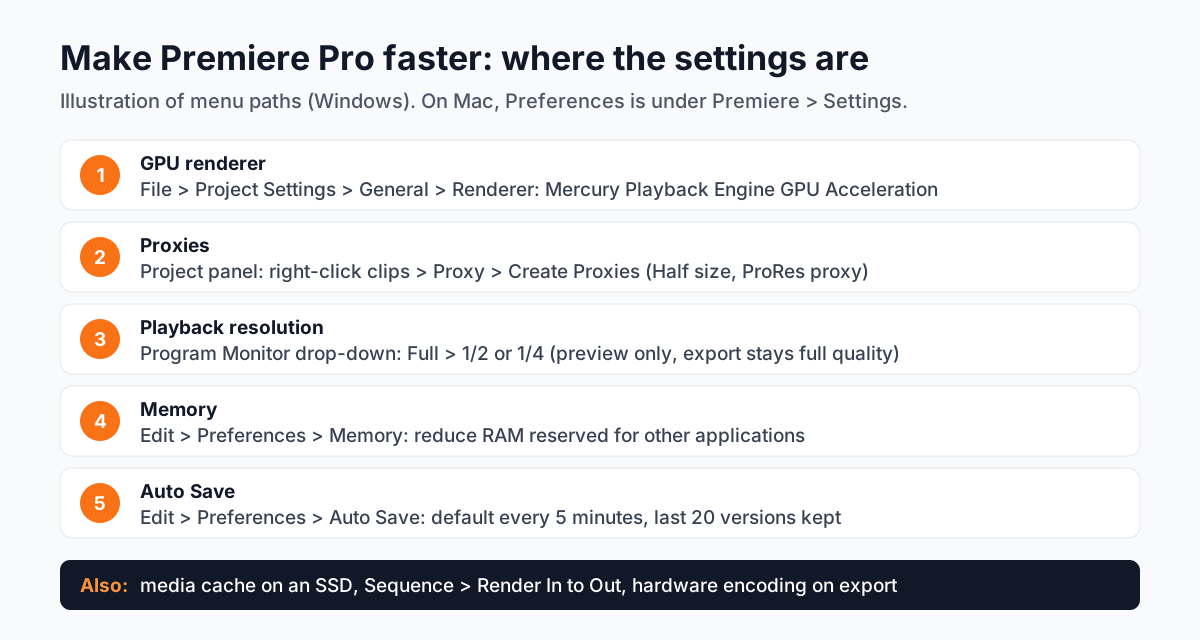
- 11. Turn on the GPU renderer
Go to File > Project Settings > General. Under Video Rendering and Playback, choose Mercury Playback Engine GPU Acceleration from the Renderer list. If you only see Software Only, update your graphics driver[1].
- 22. Edit with proxies
Proxies are small copies of big video files used only while editing. Right-click your clips in the Project panel and choose Proxy > Create Proxies. The default Half frame size with the ProRes proxy preset works well[2]. Premiere switches back to full quality when you export.
- 33. Lower the playback resolution
In the Program Monitor, set the playback resolution drop-down to 1/2 or 1/4. The preview gets lighter. Your export quality does not change.
- 44. Give Premiere more memory
Edit > Preferences > Memory on Windows (Premiere > Settings > Memory on Mac). Reduce RAM reserved for other applications so more is available for Premiere[3]. Close the browser while editing.
- 55. Put the media cache on an SSD
Premiere builds preview and audio files in the media cache. On a full or slow drive everything drags. Keep it on your fastest SSD and clean it once a month.
- 66. Set Auto Save properly
By default Premiere saves every 5 minutes and keeps the last 20 versions[4]. Check the Auto Save preferences, note where the Auto-Save folder is and keep it on your main drive.
- 77. Render previews for heavy parts
For sections with effects or colour, mark In and Out points and use Sequence > Render In to Out. Those parts then play in real time.
- 88. Use hardware encoding to export
When exporting H.264 for social media, choose hardware encoding in the video settings if your graphics card supports it. Exports are usually much faster.
How Do Undo and History Work in Premiere Pro?
Ctrl + Z (Cmd + Z on Mac) undoes the last action, as many times as you need within the session. For bigger jumps, open Window > History. Click any older step and Premiere returns the project to that point. One thing surprises beginners: after you close and reopen a project, the History panel is empty[5]. That is why Auto Save versions matter. They are your undo across days.
- C for the Razor tool and V to go back to Selection.
- Ctrl + K to cut all tracks at the playhead.
- Q and W to trim the start or end of a clip to the playhead and close the gap.
- Shift + Delete to delete a clip and close the gap (ripple delete).
- ` (the key above Tab) to make any panel full screen while you check details.
How Can You Use Premiere Pro With AI and Still Stay in Control?
Premiere now has AI helpers: Speech to Text for captions, Enhance Speech for noisy voice, Auto Reframe to turn a wide video into a vertical Reel and automatic audio ducking. They save real time. But each one needs a human check.
- Captions: read every line. Hindi and English names, brand names and numbers often come out wrong.
- Auto Reframe: watch the full Reel. AI sometimes crops out the product or the speaker's hand gestures.
- Enhance Speech: compare with the original. Too much clean-up makes a voice sound robotic.
Why Do Studios Expect Editors to Know These Settings?
In a studio you get a machine and a deadline. Nobody sets it up for you. A fresher who can switch on the GPU renderer, create proxies for 4K footage and find yesterday's Auto Save version is trusted with client work much sooner. Many practical tests in Delhi studios include a slow, heavy project on purpose, to see how you handle it.
Which Premiere Pro Projects Should You Build for Your Portfolio?
- A 4K brand film edited with proxies. Shows you can handle heavy footage on a normal laptop.
- A two-camera interview for YouTube. Multi-camera editing, clean sound and matched colour.
- One video, three formats. A 16:9 YouTube cut, a 9:16 Reel and a 1:1 post from the same footage.
Worked example (project 3): edit the 16:9 version first and lock the story. Duplicate the sequence, change the sequence size to 1080 x 1920, then use Auto Reframe and check every shot by hand, moving the frame where the AI cropped badly. Add bigger captions for mobile, move the logo into the safe area and export each version with its own name. Total time for a 60 second video: about an hour once you are practised. Clients love this, because one shoot gives them three posts.
Why Does 1-to-1 Training Help With Premiere Pro?
Most slow-Premiere problems are specific to your laptop: your graphics card, your drives, your footage. In one-to-one training the trainer sits with your screen, sets up the preferences for your machine and fixes habits as they form, like editing full-resolution 4K or never saving versions. You learn at your own pace on your own projects. Our one-to-one vs group training guide compares the two honestly.
Our video editing course in Delhi covers Premiere Pro, After Effects, sound editing and AI tools, after a graphics foundation in Photoshop and Illustrator. Premium 1-to-1 students get the "100% Job Guarantee on Premium 1-to-1" under written terms. To see what professional editing involves beyond settings, read how to learn professional video editing, then check timings and fees on the Premiere Pro and video editing course page.
Frequently Asked Questions
How do I make Premiere Pro faster on a laptop?
Set the renderer to Mercury Playback Engine GPU Acceleration, create proxies for heavy footage, lower the playback resolution to 1/2 or 1/4, reduce RAM reserved for other applications, keep the media cache on an SSD and render previews for heavy effects.
Does lowering playback resolution reduce export quality?
No. Playback resolution only changes the preview in the Program Monitor. The export uses the full-resolution media.
What are proxies in Premiere Pro?
Proxies are low-resolution copies of your video files used only while editing. They make heavy 4K footage play smoothly. Premiere uses the original files when you export.
Where does Premiere Pro save auto save files?
In the Premiere Auto-Save folder linked to your project. By default it saves every 5 minutes and keeps the last 20 versions, which you can change in the Auto Save preferences.
Why is my undo history gone in Premiere Pro?
The History panel only covers the current session. After you close and reopen a project, earlier actions are not available. Use Auto Save versions to go back further.
References
- Enable Mercury Playback Engine (GPU accelerated) renderer- Adobe Help Center (Premiere)
- Create proxies- Adobe Help Center (Premiere)
- Memory preferences- Adobe Help Center (Premiere)
- Auto Save preferences- Adobe Help Center (Premiere)
- View or make changes in the History panel- Adobe Help Center (Premiere)