What Changed in Premiere Pro Color Correction in 2026?
If you learnt colour from an older tutorial, the panels will look different. Adobe's help pages, updated on 10 November 2026, list the changes in Premiere 27.0[1]:
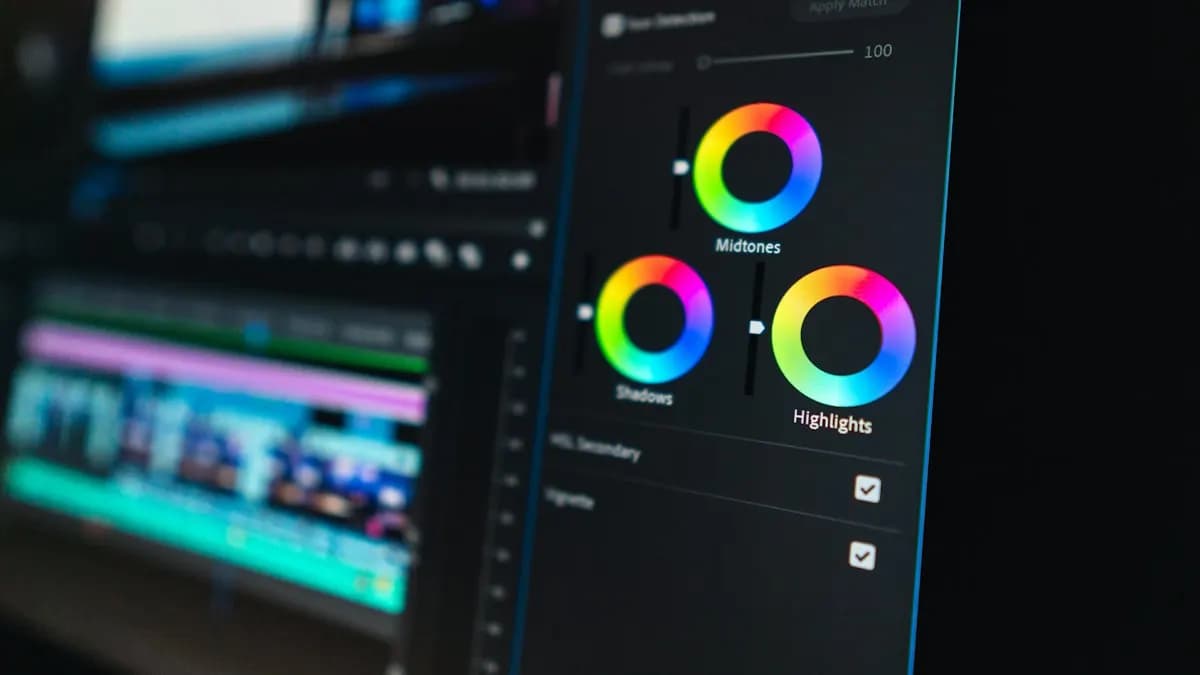
- Color Mode is a dedicated workspace for colour. Open it with the Color tab next to Edit in the top-left corner.
- The Lumetri Color panel is retired. The Lumetri Color effect still exists in the Effects panel. You edit it in the Properties panel.
- Old projects are safe. Existing Lumetri effects open exactly as before, with every adjustment intact.
- A Color Management panel handles log and raw footage and lets you choose the traditional Rec. 709 pipeline or the new Wide Gamut pipeline.
- Quick fixes in Edit mode: the Properties panel has a Color section with basic correction controls.
Using an older version such as Premiere 26? The same basic controls described below sit in the Lumetri Color panel's Basic Correction section.
What Is Inside Color Mode?
Adobe built Color Mode so editors without a colour background can learn it quickly[2]. The main parts:
| Part | What it does |
|---|---|
| Clip Grid | Shows every clip so you can jump, filter, sort, copy and paste grades and group clips |
| Color Controls | Adjust, Style and LUT operations; Adjust includes Auto Color for exposure and white balance |
| Color Monitor | A large viewer with Sequence and Clip playback, plus Solo mode to hide overlays and titles |
| Color Management | The colour setup of the sequence; Direct Rec. 709 (SDR) is the default for most new sequences |
Basic Color Correction Controls Explained
These controls fix most everyday footage. Adobe's help page explains each one[3]:
| Control | What it fixes |
|---|---|
| White balance eyedropper | Click something white or grey in the shot and Premiere corrects the colour cast |
| Temperature | Left is cooler (blue), right is warmer (orange) |
| Tint | Removes a green or magenta cast, common under tube lights |
| Exposure | Overall brightness |
| Contrast | Mainly the midtones; more contrast makes darker areas darker |
| Highlights / Shadows | Bright and dark areas, while limiting clipping |
| Whites / Blacks | The brightest and darkest points; controls clipping |
| Saturation | How strong all colours are |
| Auto | Sets the tone sliders to spread the tonal range and limit clipping |
Premiere Pro Color Correction Tutorial: A Simple Order
Most bad colour comes from doing things in the wrong order. Follow this order on every clip:
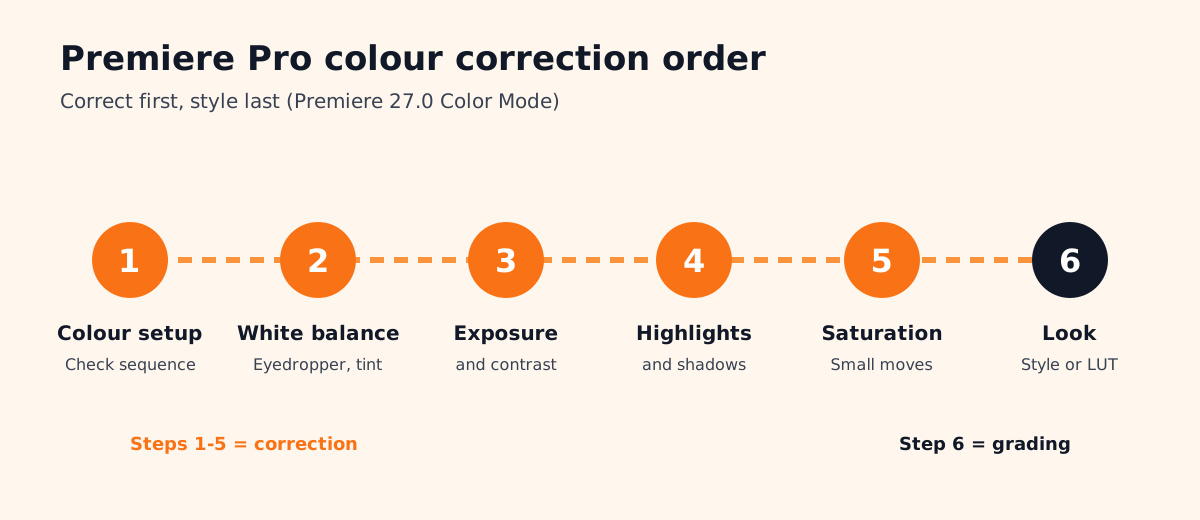
- 1Check the colour setup
Confirm the sequence uses the right setup in Color Management before touching any clip.
- 2Fix white balance
Use the eyedropper on a white wall, shirt or paper. Then fine-tune Temperature and Tint.
- 3Set exposure and contrast
Faces should look natural, not grey and not glowing.
- 4Recover highlights and shadows
Bring back a bright window or a dark corner without making the image flat.
- 5Adjust saturation
Small moves. Skin tones go orange fast.
- 6Add the look last
Use Style operations or a LUT only after the clip is correct.
Want faster playback while you grade? Our guide on how to make Premiere Pro faster explains proxies and cache settings.
How to Color Correct Multiple Clips and Match Them
Many people search for Premiere Pro's old Clip Match button. Adobe has removed Clip Match and the clip Comparison Mode in Premiere 27.0[2]. Matching is now done by eye, which is how professional colourists work anyway:
- Grade one hero clip first, usually the widest, clearest shot of a scene.
- Copy and paste the grade to other clips from the same scene in the Clip Grid.
- Group clips shot in the same light so one change updates them all.
- Fine-tune each clip by looking at skin tones and white objects side by side as you move through the sequence.
This matters most in long, multi-camera jobs, such as the ones in our wedding video editing guide, where two cameras rarely match out of the box.
Why Color Correction Matters in Video Editing Jobs
Clients notice colour before they notice cuts. A Reel with orange skin or a blue office looks cheap, even if the edit is perfect. That is why many video editor posts list colour work next to editing.
One example we read on Internshala on 17 November 2026, in our own words: a Gurgaon digital agency wants a video editor who edits in Premiere Pro, DaVinci Resolve or Final Cut Pro, creates motion graphics in After Effects and handles audio editing, colour grading and typography, with 1 to 2 years of experience[4].
For the other everyday skills studios expect, read our Premiere Pro tips for beginners and keep the Premiere Pro shortcuts list handy.
3 Portfolio Projects to Practise Color Correction
- Tube-light rescue: shoot a short interview under tube lights, then fix the green cast with Tint and white balance. Show before and after.
- Two-phone match: film the same scene on two different phones and match them so a viewer cannot tell.
- Day-to-evening look: correct a daytime clip first, then add a warm evening look with Style controls, keeping skin natural.
Worked example for project 1: say your interview clip looks green and dull. Click the eyedropper on the white wall behind the speaker, move Tint slightly towards magenta, raise Exposure until the face looks natural, pull Highlights down so the window does not burn out, then add a little Saturation. Five moves, a clip that looks professional.
AI and Agentic AI in Color Work
Color Mode's Auto Color sets exposure and white balance automatically as a starting point[2]. Editors also use AI assistants such as ChatGPT or Gemini to explain a colour problem. They use AI video tools to generate B-roll that then needs matching to the real footage. Some teams use AI agents to prepare many export versions from one graded sequence.
What the human still decides: whether skin looks real, whether two shots match and what mood the client wants. Auto is a start, never the finish. CABA's courses now teach AI and agentic AI workflows inside the curriculum, with the editor checking every frame.
Why One-to-One Training Helps With Color
Colour is hard to learn from videos because your screen, footage and lighting are different from the tutor's. A trainer sitting with you can point at your clip and say "too orange, pull Temperature back". That feedback trains your eye faster than any preset.
Our video editing course in Delhi covers Premiere Pro, After Effects, sound and AI video tools through real projects, with one-to-one feedback. It comes with a 100% Job Guarantee; read the job guarantee terms. See the full plan on the video editing course page.
| Stage | Video editor pay per month (Delhi NCR) |
|---|---|
| Fresher | ₹12,000 to ₹15,000 |
| After 1 year | ₹18,000 to ₹22,000 |
| After 2 years | ₹30,000 to ₹35,000 |
Frequently Asked Questions
How do you do color correction in Premiere Pro?
In Premiere 27.0, open the Color tab, check the sequence colour setup, then fix white balance, exposure and contrast, highlights and shadows and saturation before adding any look.
Where is the Lumetri Color panel in Premiere Pro?
It is retired in Premiere 27.0. The Lumetri Color effect still works and is edited in the Properties panel; new colour work is done in Color Mode.
How do I match colors between clips in Premiere Pro?
Clip Match was removed in Premiere 27.0. Grade one hero clip, copy and paste the grade in the Clip Grid, group similar clips and fine-tune by eye.
What is the difference between color correction and color grading?
Correction makes the clip look natural and consistent. Grading adds a creative look after the correction is done.
Should I use LUTs for color correction?
A LUT can be a starting point, especially for log footage, but correct white balance and exposure as well. Do not rely on a LUT alone.
References
- Changes to Lumetri Color (updated 10 November 2026)- Adobe Premiere Help
- Color Mode in Premiere (updated 10 November 2026)- Adobe Premiere Help
- Basic color correction options (updated 7 January 2026)- Adobe Premiere Help
- Senior Video Editor job in Gurgaon, Internshala (seen 17 November 2026)- Internshala